Posts

Showing posts from January, 2012

Another Quilt Along

Image
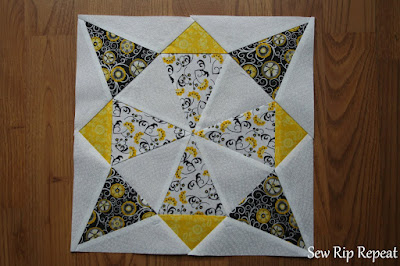
Talk about jumping on the bandwagon with all these quilt alongs. I found another blog that is doing a quilt along called Sew Happy Geek and she's been posting a fun quilt along. I went through my stash of fabric that I had laying around and starting picking some colors. Black, Red, White and also a flower print that I wish I didn't really use because it just isn't fitting in very well. My first block that I did was called the Woven Block. It really seemed to go together very well. I was happy with my seams and when I don't have to rip anything out I'm even happier! Next block was called the Snowball Block. We had to lay 2.5" squares on top of our 6.5" squares. Sew in a diagonal and then cut 1/4" past our seam. Again luck was on my side and the seams and points turned out very well. Friendship Star Block will be my 3rd block for the Quilt Along. What I thought was going to be a very easy block turned into more of a challenge. Those Half

Whirling Star

Image
Remember my first attempt at the Ribbon Star Block  from Faith over at Fresh Lemon Quilts ? Well I've moved on to the Whirling Star Quilt Block. I'm still using fabric that I purchased at Joann's from a series called "Sunny Collection". I think my new favorite color choices are yellow and gray - LOVE! The Whirling Star consisted of paper piecing fabric to what else - paper. Being someone who's never made quilt blocks before this was quite a challenge. I needed to use a 90/14 needle so it would perforate the paper so when the time came for me to remove the paper it could be done easier. I also needed to adjust my stitch length on my machine to 1.4. I have all these notes above my sewing area because a true 1/4" on my machine is a stitch width of 3.0 and my needle needs to be mirror imaged for it to move. Crazy! Since it takes so much concentration for me to think, cut and then sew (I did have to rip out my small sample piece) I didn't take any pictur

Outdoor Valentine Pillow

Image
Who would have thought for $6 I can buy a Canvas Dropcloth from Home Depot and make outdoor pillows from it? Not me! So far I've made 4 other pillows from 1 dropcloth. Here are the directions to make my newest pillow for the front porch. The pillow's finished size is 12" square. I cut my Canvas Dropcloth into 3 pieces: 1-13"x13", 1-7"x13" and the last one is 9"x13". The pillow will be an envelope style because I am covering other pillows that usually stay on the porch (one of these days I'll show what's underneath). I used my serger before I hemmed the 2 smaller pieces. I traced some heart die-cuts that I had on some Steam-n-Seam and ironed it onto 3 different pieces of scrap fabric. I then placed the 3 hearts on the pillow front and used my invisible marker to mark where I wanted to sew the banner line. I then used my blanket stitch to outline the hearts with red thread. At first I just sewed on the lines for th

Solstice Stars Series

Image
I've done it! I finally went out of my comfort zone and joined a Flickr group that lets you post pictures of quilt blocks that are a part of a series or group. I came across a blog called Fresh Lemons written by Faith. Faith was starting a series called Solstice Stars and the first block is the Ribbon Star Quilt Block. I have some fabric that I am working with for the Craftsy Block of the Month and I decided to use them for this one too. I got the fabric over at Joann's when they were running one of their many specials (sorry this girl doesn't have any fancy quilt shop fabric). I really love the grays and yellows. This just might be my new found favorite colors. I worked all afternoon on my quilt block deciding which 4 fabrics to go with. I have to say that this block was so enjoyable for someone who has never really made any sort of quilt blocks before this month. I'm a newbie and proud of it! So here it is: Can you believe it? All the points lined up perfectly

Pillow Blankets

Image
Just wanted to share the Christmas gifts I made for my nieces. I knew they would be the perfect recipients of these fleece Pillow Blankets. I went to my local Joann's and bought 2 1/2 yards of fleece in different colors of purple. All 3 of them have their rooms painted a shade of purple. I wanted the  pillows to not only hold the blanket part but have a zipper so they could put whatever treasurers that they take to sleepovers could hide. I was quite impressed with myself on how well I put that invisible zipper in. It took alot of Sewing, Ripping and Repeating over and over again before my brain had the ah ha moment. The Pillow Blanket is really just made up of a piece of fleece with a rectangle pocket in the middle and on the bottom. To finish off the blanket's edges I didn't want to hand stitch around them using a wide blanket stitch. I knew by hemming the edges it would make them to bulky so I ended up serging all around with my serger. Next time I&

Recycled Christmas Cards

Image
Update: I won the CSI Project's Pick of the Week! I'm so thrilled! If I see something that I really like I tend to hoard file it away for a later project. That is the case with the 2 Christmas Cards below. The boating picture was received by my husband's aunt and uncle many, many years ago. Since we have a cottage and love to boat it just seemed appropriate to keep this card. This card turned into something special when I opened it before I started this project to realize that my husband's uncle has been gone for over 10 years. It now holds even more special meaning to us. The snowman and little boy was a picture that I just thought was the cutest card. Don't all children feel that sense of connection when they have finished making the most memorable of snowmen. I finally had my husband cut out a piece of oak that he had in his garage to the appropriate size for my cards. I wanted the wood to be a little bigger than the card. At first h